

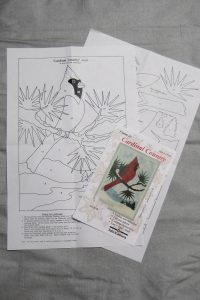
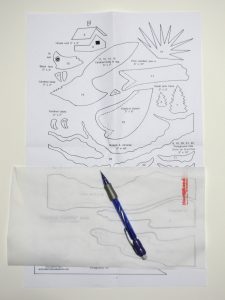
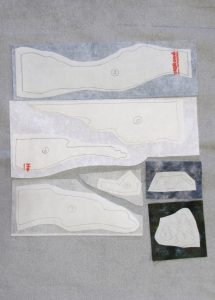
1.) Each fused applique landscape has easy instructions, full sized and reversed pattern pieces, and a placement guide.
2.) Kits contain all fabric needed to complete one landscape. You will need a piece of white cotton as the canvas for the applique pieces.

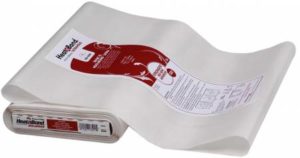

3.) I recommend these tools for success: Applique Pressing Sheet(TM), HeatnBond Ultra No-Sew fusible web, Fiscars 5” Softouch Micro-Tip scissors and an iron.
4.) Trace the pattern pieces onto the paper side of the HeatnBond Ultra with a mechanical pencil. Number pattern pieces.
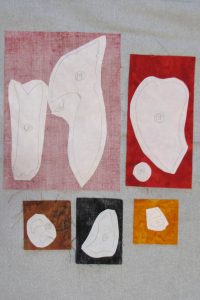
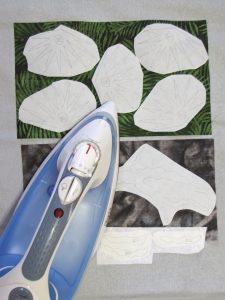
5.) Loosely cut out pattern pieces from the fusible web; then iron on to the wrong side of corresponding fabric.
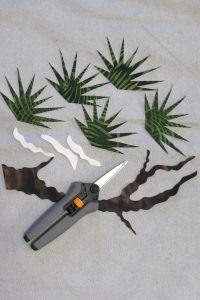
6.) Cut out pieces.
7.) It will be helpful to group your pieces in units; pine branch, background and cardinal.
8.) Careful cutting assures good results.
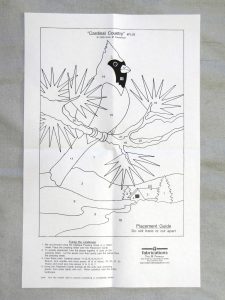

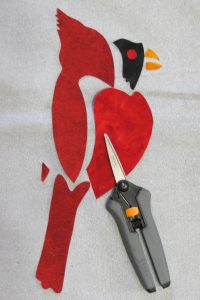
9.) The Placement Guide is numbered in numerical order.
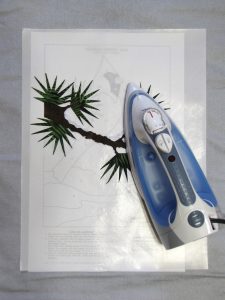
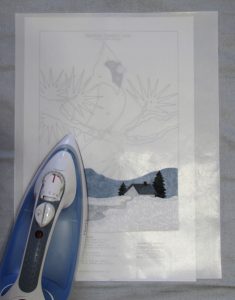
10.) Place the Applique Pressing Sheet(TM) over the Placement Guide. The transparent quality allows you to see your pattern through the sheet.
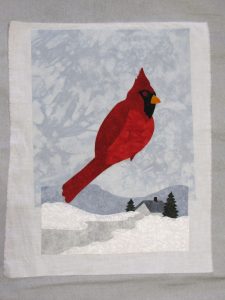
11.) Fuse the cardinal pieces together directly onto the Applique Pressing Sheet. When cool gently peel off the Cardinal unit. Set aside.
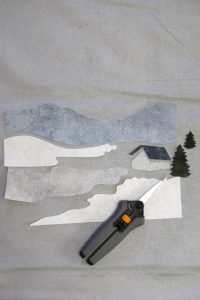
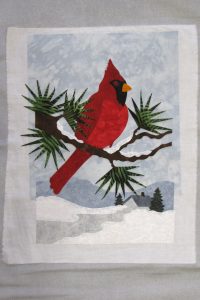
12.) Fuse the pine branch together into one unit. Set aside.
13.) Fuse the background together into one unit. Set aside.
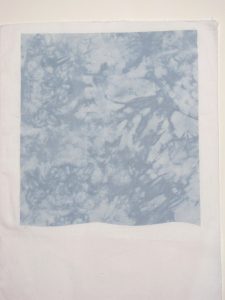
14.) Fuse the sky fabric on a piece of Heat n Bond Ultra fusible web; then fuse to the white cotton.
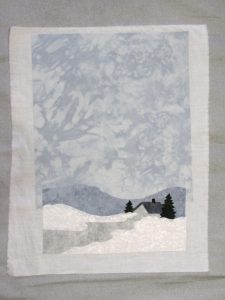
15.) Fuse the background unit in place.
16.) Using your “Placement Guide” place the Cardinal unit on the sky.
17.) Next, place the pine branch. Fuse both onto the background.
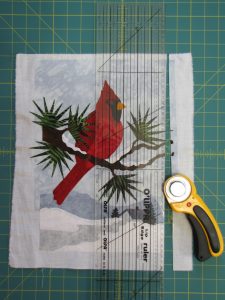
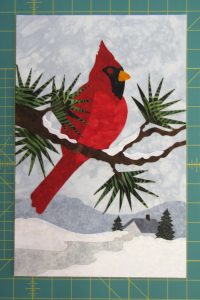
18.) Square off completed landscape with a rotary cutter, ruler and mat.
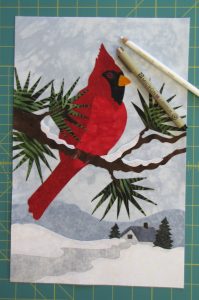
19.) Add details like the eyeball with a sparkle and window in the house with black Pigma pen and white colored pencil.
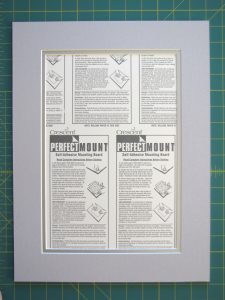
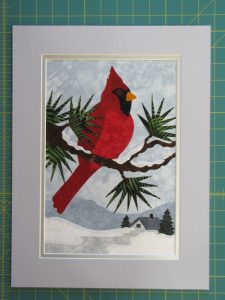
20.) Choose an acid free double mat and sticky board or use mounting tape.
21.) Mount your completed landscape on the acid free board.
22.) Add the matting.
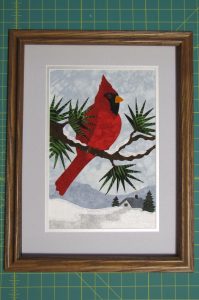
23.) Add a frame and conservation glass if desired. ENJOY!